How to Stack and Layer Views With ZStack in SwiftUI
SwiftUI provides us with quite a few "off the shelf" layout methods to help build UI for our app. We have HStack, VStack, ZStack, GridView and more. In this articl we will look at ZStack. ZStack is a view that comes with SwiftUI that overlays it subviews. Essentially allowing you to stack a view on top of one another.
Simple ZStack Implementation
Let’s start of simple by adding two views on top of each other using ZStack.
struct ContentView: View {
    var body: some View {
        ZStack {
          //#1
            Rectangle()
                .foregroundColor(.blue)
                .frame(width: 200, height: 200, alignment: .center)
                .cornerRadius(20)
          //#2
            Rectangle()
                .foregroundColor(.white)
                .opacity(0.4)
                .frame(width: 150, height: 150, alignment: .center)
                .cornerRadius(200)
        }
    }
}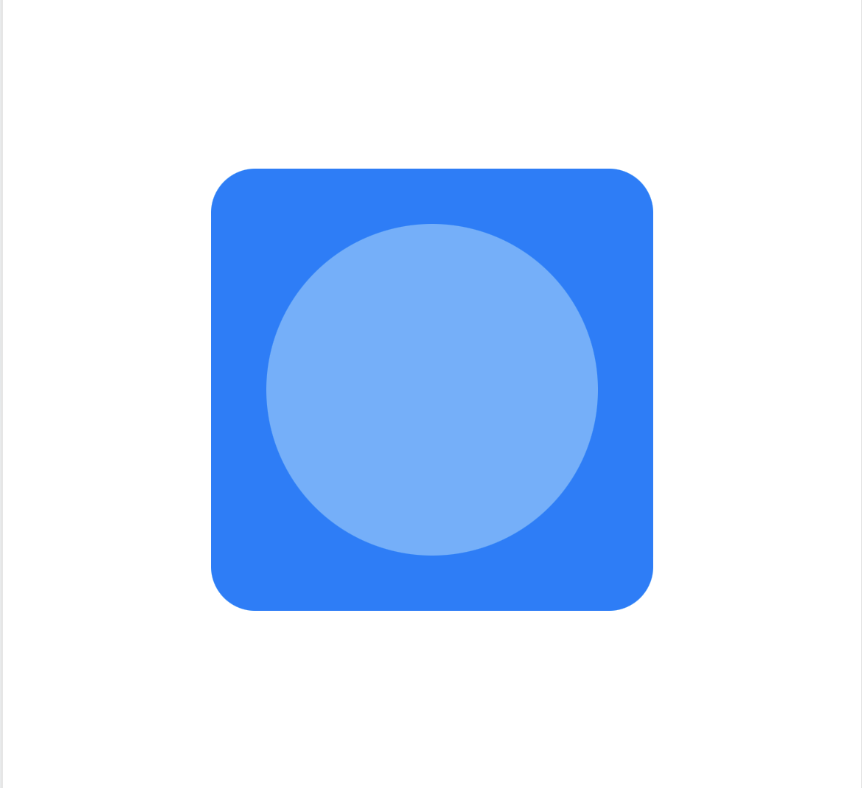
Rectangle #1 will be the bottom-most rectangle while the rectangle #2 will be top most. As you keep adding views, the last view will be top most in the view hierarchy.
We can also change view's alignment, by passing in the alignment argument in the ZStack. The following alignment options are available:
.leading, .trailing, .center, bottom, top, topLeading, topTrailing, bottomLeading and bottomTrailing
\
ZStack(alignment: .leading) {
  //1
    Rectangle()
        .foregroundColor(.blue)
        .frame(width: 200, height: 200, alignment: .center)
        .cornerRadius(20)
  //2
    Rectangle()
        .foregroundColor(.white)
        .opacity(0.4)
        .frame(width: 150, height: 150, alignment: .center)
        .cornerRadius(200)
}
The above code will align all the items on the leading edge of the bottom most view.
Advance Layout with Animation using ZStack:
Lets create something more interesting using ZStacks. This is what we will create:
We will animate this as well using simple offset values. So, first start of by adding a ZStack to the content view and also creating an array of colors.
Add the following lines top the top of the ContentView.
var data : [Color] = [.blue, .green, .yellow, .purple, .red]
@State var offsetval = 0
Next, inside the ZStack, we will add a ForEach loop, that will iterate over the data.count. Please note here that we are not iterating over the colors, but instead the index value of each item in the array.
ZStack {
    ForEach(0..<data.count) { i in
        Rectangle()
            .foregroundColor(data[i])
            .frame(width: 200, height: 200, alignment: .center)
            .cornerRadius(20)
            .offset(x: CGFloat(i * offsetval), y: CGFloat(i * offsetval))
    }
}
.onAppear {
    withAnimation(.easeOut(duration: 2)) {
        offsetval = 10
    }
}
Inside, the ForEach loop, we are creating a rectangle, giving it the ith color from the array. We are also giving the rectangle a frame of width of 200px and height of 200px. We will also add a cornerRadius of 20. The last thing I will add here is an offset modifier. This modifier allows you to just move the view in x or y axis. This is one of the most used view modifiers for animations.
So, we will offset each view depending on its position in the stack. We do this by using the index value i. We will multiply the I value with the offsetval property we set earlier. Initially this will be 0. Now, lets add the .onAppear modifier and inside it we will change the offsetval value to 10. We will wrap this around a withAnimation block and set the duration to 2 seconds.
The result is shown in the above gif.
So as we can see ZStack is an extremely powerful layout tool available in SwiftUI. The above animation can be used in the Splash screen, and if you want to learn more about how to implement splash screen in SwiftUI, check out this article.
The full code to this project is available on GitHub.