How to Animate Views in SwiftUI
Animations in SwiftUI are extremely easy to work with and are powerful enough to create stunning UI/UX experiences without writing a ton of code. We will start of by basics of animations, how to implement them, and different animation styles and tweaks. Later, we will create a complex pulsating animation using SwiftUI.
.animation modifier:
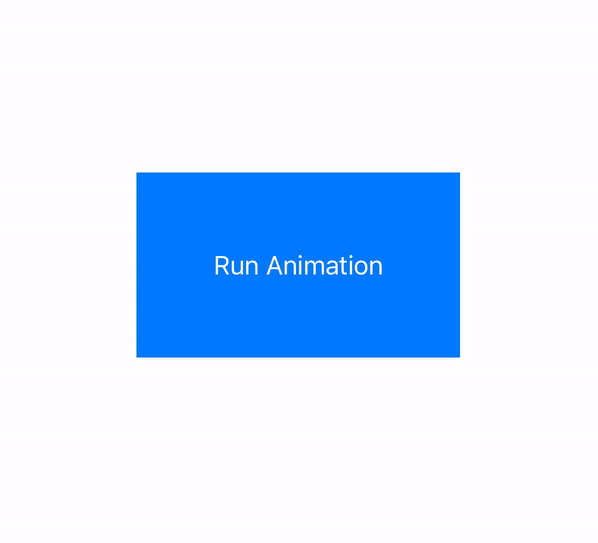
This modifier allows you to animate the view to which it is attached to. So, lets create a simple Button and when you tap on it, it gets bigger/scales up. Here is how you can do it:
struct ContentView: View {
    @State private var scaleValue = 1.0

    var body: some View {
        VStack {
            Button("Run Animation") {
                scaleValue += 1
            }
            .padding(50)
            .background(.blue)
            .foregroundColor(.white)
            .clipShape(Rectangle())
            .scaleEffect(scaleValue)
            .animation(.easeInOut(duration: 2), value: scaleValue)
        }
    }
}
Here you can see we have animation modifier attached to the Button and we are providing it a value. So, whenever this value property changes, the transition to the next state will be animated. Here, the property called scaleValue is 1 to start with, and we are passing this property to the .scaleEffect modifier as well. As we tap on the button, the scale value increments by a value of 1 and in doing so, scales up the button. The animation modifier helps us animate this change. Lets look at this modifier in more detail.
The .animation modifier takes in two parameters; the animation itself and the value. We have discussed the value parameter above the animation parameter is basically the fun part here. We can provide it with different animations and each with a duration.
Some basic ones are:
easeInOut: animation begins slowly, picks up pace and then closes out fast.
easeIn: animations begins slowly
easeOut: animations begins quickly and slows down towards the end
linear: similar speed throughout the animation
spring() - customize spring animations with pin point accuracy (dampness, mass, response) etc. Perfect for animation chaining with other spring or interactiveSpring animations.
We can also apply the .repeatCount modifier to the animation that allows you to set the number of the times you want the animation to take place. Here is how to set repeat count:
.animation(.easeInOut(duration: 2).repeatCount(4, autoreverses: true), value: scaleValue)
Autoreverses allows you to reverse the animation back to its original state and then animate it again for the next count.
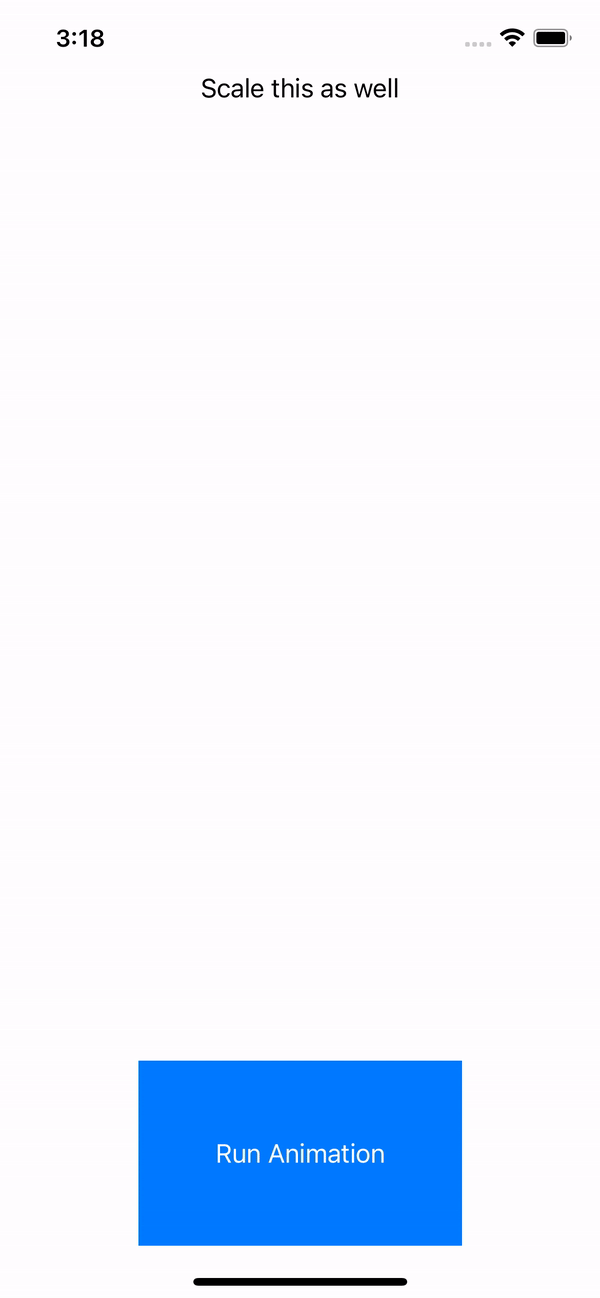
Now, there is another function that you can use to get similar sort of animations, and that is when you need to animate multiple views on change of same properties. For this we can use .withAnimation wrapper. Here is how to use this:
struct ContentView: View {
    @State private var scaleValue = 1.0

    var body: some View {
        VStack {
            Text("Scale this as well")
                .scaleEffect(scaleValue)

            Spacer()

            Button("Run Animation") {
                animateViews()
            }
            .padding(50)
            .background(.blue)
            .foregroundColor(.white)
            .clipShape(Rectangle())
            .scaleEffect(scaleValue)
        }
    }

    func animateViews() {
        withAnimation(.easeInOut(duration: 2.0)) {
            self.scaleValue = 2.0
        }
    }
}
Now, inside a VStack, we have added a new Text view and added the scaleEffect modifier and passed it the same property of scaleValue. In the button's action closure we will call a function animateViews(). Inside the animateViews() function, we will use the .withAnimation and in its closure, we will change the value of scaleValue to 2.0. This will now animate the changes.
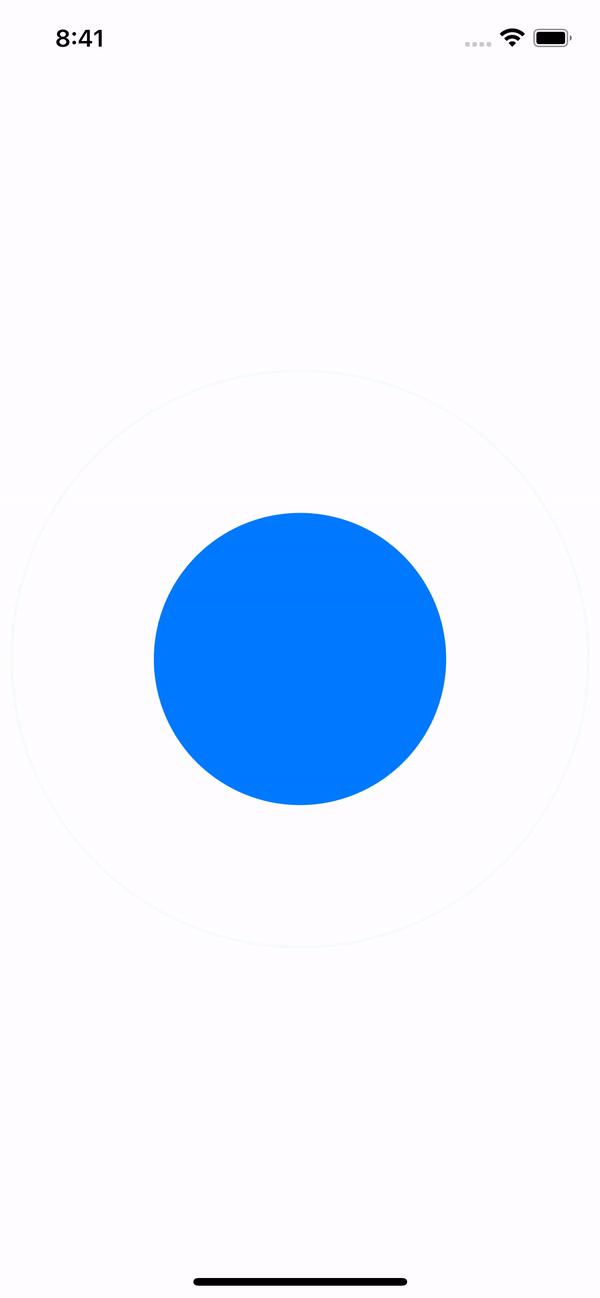
Now lets create something more complex, using the same animation modifiers mentioned above:
struct ContentView: View {
    @State private var animationValue = 1.0

    var body: some View {
        VStack {
            Circle()
                .padding(100)
                .foregroundColor(.blue)
                .overlay(
                    Circle()
                        .stroke(.blue)
                        .padding(100)
                        .scaleEffect(animationValue)
                        .opacity(2 - animationValue)
                        .animation(.easeInOut(duration: 1).repeatForever(autoreverses: false), value: animationValue)


                ).onAppear {
                    scaleValue = 2
                }
        }
    }
The above code will give us a pulsating animation. Lets go step by step:
First, I created a Circle() and gave it a padding of 100px, blue color and then used an overlay modifier to add another view that will pulsate/move outwards. To do this, we create another circle inside that overlay modifier and provide the circle with same padding and just a stroke of color .blue. There are two things which we will be animating on this particular circle: 1) opacity and 2) scaleEffect.
We will use the animationValue for both opacity and scaleEffect. Lets look at the opacity modifier. Since we are just changing the value of animationValue to 2, so opacity will start off from 1 (2-1 = 1) and end at 0 (2-2 = 0). Now, lets look at the animation modifier. Here we are using .easeInOut animation, with duration of 1 second, and it will repeat forever and we have autoreverses set to false.
Here is how this looks like: