How to Implement an Action Sheet in SwiftUI
There are times when you want to show a selection of options to the user, one way to do this is by using an action sheet. In SwiftUI, you can do this using confirmationDialog() modifier. It's worth noting that this modifier only works for iOS 15 and above. If you are targeting iOS 13/14 then you need to use ActionSheet instead.
In this tutorial, we will go through both these methods. Let's start with confirmationDialog() modifier first.
iOS 15+ ConfirmationDialog Modifier in SwiftUI
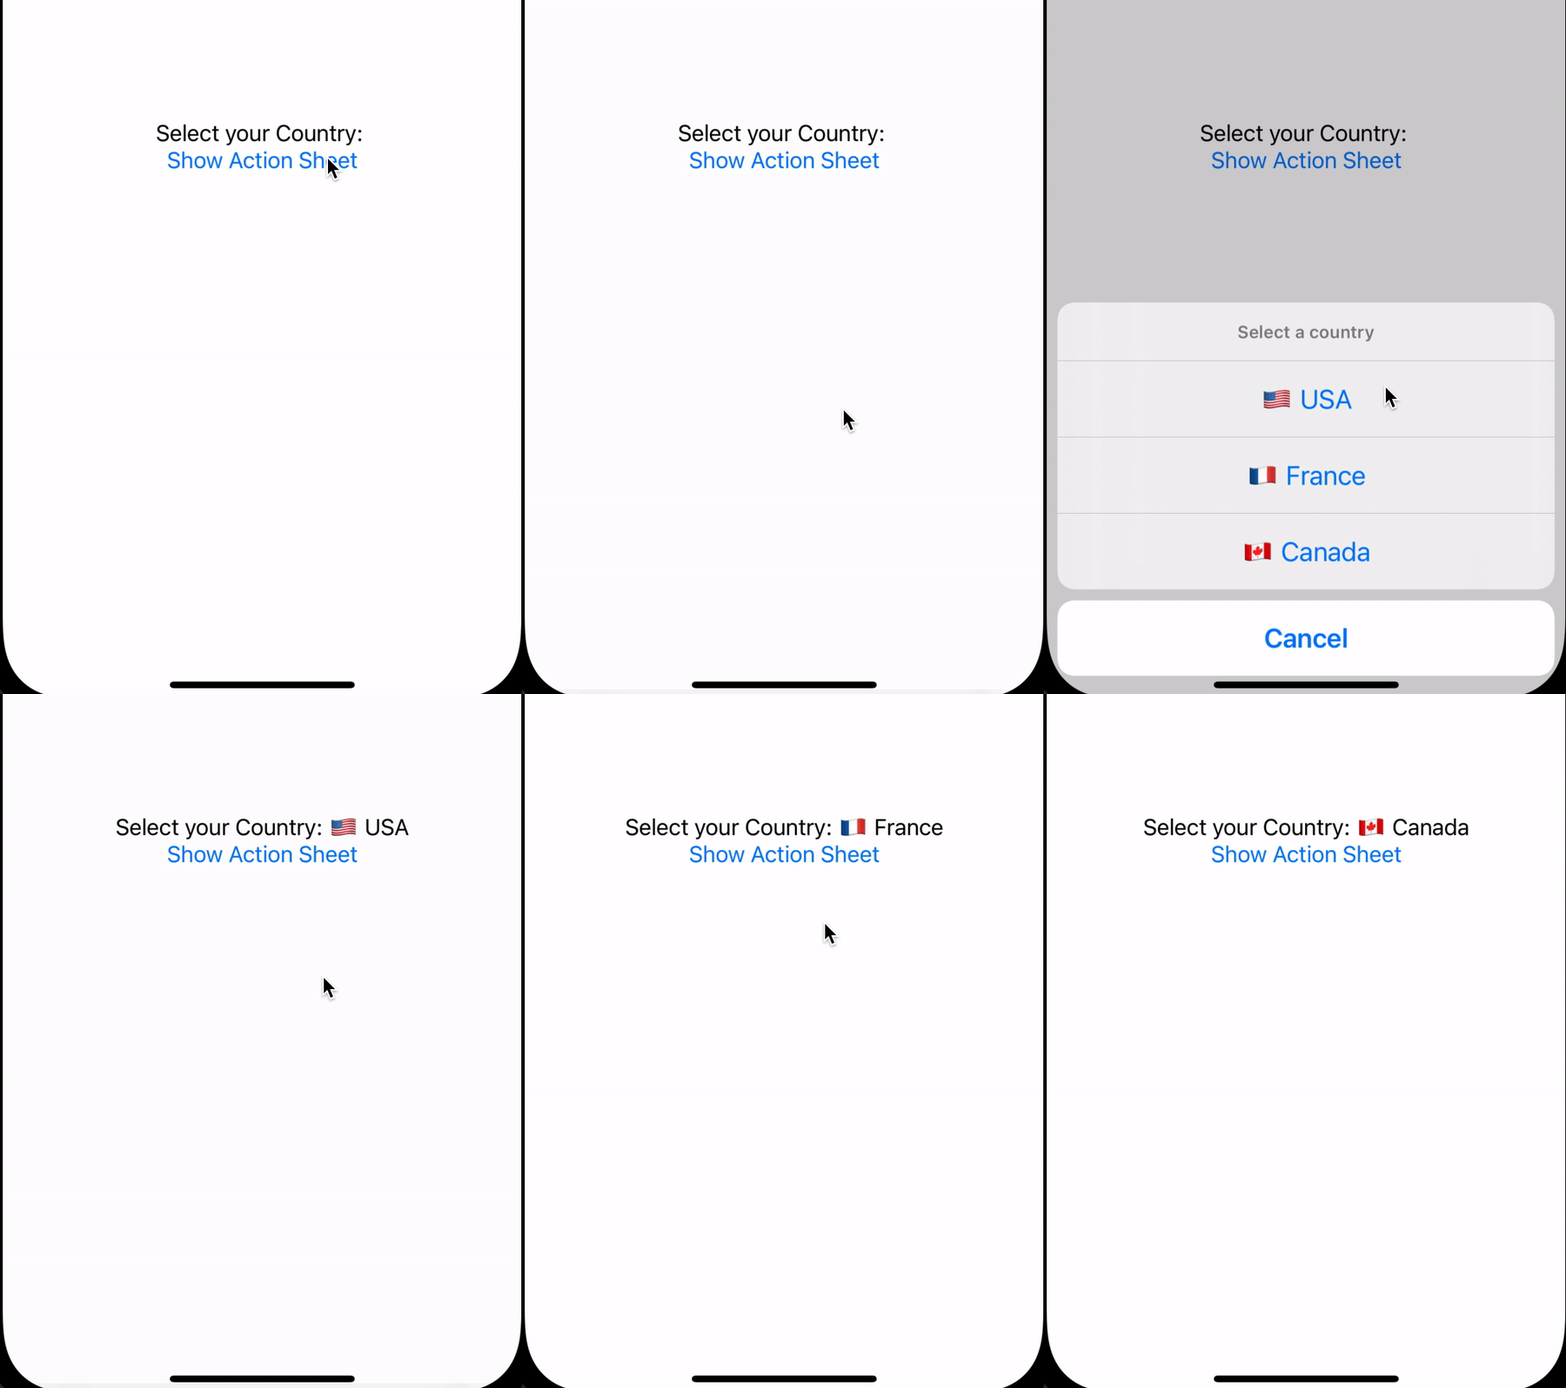
Here is the code for this first method. Here you can see we have a state property called showOptions. When we tap the “Show Action Sheet button”, we will make its value true.
struct ContentView: View {
    @State var showOptions: Bool = false
    @State var selection: String = ""
    var body: some View {
        Text("Select your Country: \(selection)")
        Button {
            showOptions = true
        } label: {
            Text("Show Action Sheet")
        }.confirmationDialog("Select Countries", isPresented: $showOptions) {
            Button("🇺🇸 USA") {
                selection = "USA"
            }
            Button("🇫🇷 France") {
                selection = "France"
            }
            Button("🇨🇦 Canada") {
                selection = "Canada"
            }
        } message: {
            Text("Select a country")
        }

    }
}
Then we are simply using confirmationDialog modifier, the modifier takes in the title, and a boolean binding. We will pass the showOptions boolean. Note the $ symbol in front of showOptions. This is a way to do two way binding in SwiftUI. So when the showOptions becomes true when we tap the button, the action sheet shows up. When we dismiss the action sheet, the value of howOptions goes back to false. It’s a way to track if the action sheet is being presented or not.
Please also note that confirmationDialog is supported by multiple platforms, and the string passed to title argument isn't shown on iOS. In order to give your action sheet a title, you need to provide a message closure as shown above.
Next, the .confirmationDialog takes in a closure which contains all the action Buttons(). So here we have created three buttons, and the action closure of each button changes the selection property. We are also showing the selection property in a Text view right above the “Show Action Sheet” button. So, when any of the action buttons is tapped, the text is updated.
We can even add .destructive style to the Button so that SwiftUI colors the button text appropriately.

We can see that there is repetition in the confirmationDialog closure. We are creating Buttons and the code is pretty much similar for all of them. We can do better here by adding a ForEach loop within the closure like so:
struct ContentView: View {
    @State var showOptions: Bool = false
    @State var selection: String = ""
    var body: some View {
        Text("Select your Country: \(selection)")
        Button {
            showOptions = true
        } label: {
            Text("Show Action Sheet")
        }.confirmationDialog("Select Countries", isPresented: $showOptions) {
            ForEach(["🇺🇸 USA", "🇫🇷 France", "🇨🇦 Canada"], id: \.self) { item in
                Button(item) {
                    selection = item
                }
            }
        } message: {
            Text("Select a country")
        }
    }
}
So we are iterating over the array using ForEach loop, and within the body of the loop, creating a Button and providing action to it.
Now let us discuss how to achieve the same for iOS 14 and below.
Action Sheet modifier for iOS in SwiftUI
Let's use actionSheet approach now. Here you also need to pass a boolean to track the presentation state of the action sheet.
struct ContentView: View {
    @State var showOptions: Bool = false
    @State var selection: String = ""
    var body: some View {
        Text("Select your Country: \(selection)")
        Button {
            showOptions = true
        } label: {
            Text("Show Action Sheet")
        }.actionSheet(isPresented: $showOptions) {
            ActionSheet(title: Text("Select Country"),
                        buttons: [
                            .default(Text("🇺🇸 USA")) {
                                selection = "🇺🇸 USA"
                            },
                            .default(Text("🇫🇷 France")) {
                                selection = "🇫🇷 France"
                            },
                            .default(Text("🇨🇦 Canada")) {
                                selection = "🇨🇦 Canada"
                            },
                            .destructive(Text("Cancel"))
                        ])
        }

    }
}
The API isn't as straightforward as the .confirmationDialog. Here you need to use ActionSheet struct, pass in the title and an array of type Alert.Button. The .default button just provides simple styling option. However, with this approach you don't get the Cancel button for free and therefore you need to add .destructive to get the cancel button.
The end result is same for both, you get an action sheet and tapping on any action updates the text view with the selection.
The code for this project is available on GitHub.